Create a Transparent PNG Logo In PhotoShop
With the new ability to add a transparent PNG file in JDLab2You
, some of you may not know how to create one in Photoshop. This series of steps shows you how.
If you haven’t worked with a transparent PNG file before, click the JD logo on the right, and save it to your hard drive. Open it in Photoshop. You can see how easy it is to add to your images as a new layer.
Steps:
1. Open your logo file in Photoshop. Go to Image -> Mode and verify it is RGB, 8-bits per channel.
2. If your logo has a background that is not a layer, you’re going to have to remove it. Start with Layer -> New -> Layer via Copy to make a copy of your logo layer (you don’t want to work on the original). Otherwise, skip to step #7.
3. Create a new blank layer with Layer -> New. This will be the transparency layer when you save your final logo.
4. In the Layers Palette, drag the new blank layer (the one with the black and white checkerboard) to the bottom of the layers. Hide the original background layer. Your Layers palette should look like this. Now is a great time to save your work as a .PSD file with a new name so you don’t accidentally change your original logo file.
5. To manually remove the background, start by clicking the logo copy layer in the Layers Palette. Use the Magic Wand Tool to select a portion of the background (you’ll see the marching ants!), then hit the Delete key to remove the selected portion of the background. Hold down the “+” plus key to select several areas at the same time. As you remove the background, it will be replaced with the black and white checkerboard pattern beneath it. By changing the “Tolerance” value in the upper right corner, you can make the Magic Wand select more or less of the background with a single click of the Magic Wand. If your logo has letters like an “O”, make sure you delete the background inside the letters too. If you select too much background and accidentally delete part of your logo, use Ctrl+Z (PC) or Cmd+Z (Mac) to undo your last step.
If you can hide your background layer in Photoshop, you’re all set. If you are using a sports team or school logo that you received as a JPG, consider asking them if they can send you the original artwork. It may save you a lot of time.
6. Once you think you have all your background is removed, you’ll want to test it. Use the color picker to set the foreground color to black if your original background was white or white if your original background was black. Select your transparency layer, then use the Paint Bucket tool to temporarily fill it with white or black. Zoom into your image, and you can see any places where the background wasn’t completely removed. Use Ctrl+Z (PC) or Cmd+Z (Mac) to undo the Paint Bucket fill, then continue to remove any remaining artifacts with the Magic Wand or the Eraser Tool.
Make sure to remove any color or hide your transparency layer when you are done testing.
7. Resize your file. Go to Image -> Image Size, set the resolution to 300 pixels/inch. Then set the size of your logo so that either the width or height is no more than 600 pixels. This will give you a logo that is 2 inches on the longest side, which will be enough resolution for virtually any print you use it on in the future.
8. Go to File -> Save for Web or Device. Set the output file type to PNG-24, and click the Transparency checkbox. Click the preview button, and your finished logo will display in a browser window, so you can verify your work one last time before you save it.
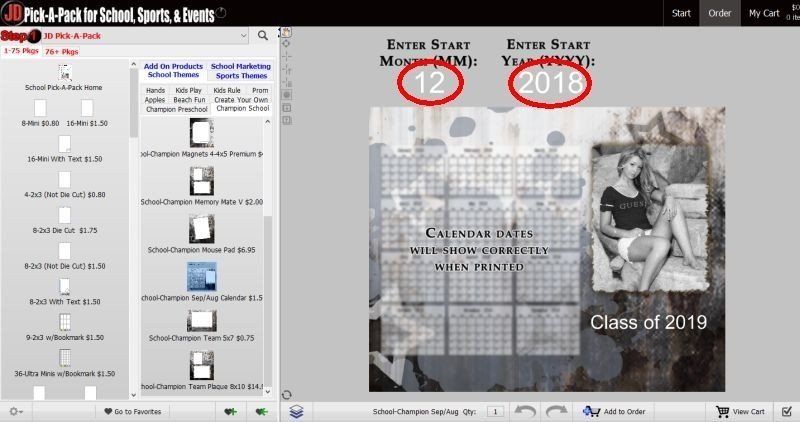
9. Use these instructions to add a logo to JDLab2You. Note that once you’ve placed your logo, you can use the Opacity slider (in yellow on image below) to make your logo less pronounced on the image.
10. If you don’t have a image logo, you can start with a 2×2″ square at 300 dpi, create your logo from text, then skip to Step #8. The advantage of this method is that you can create both light and dark versions of your logo, then select which version you want to use depending on your print image’s background color.